XLS Range Editor
Migration notice: This page was converted from the legacy TO3000 3D CHM. Classification: KEEP. Legacy wording is evidence only — verify against current TO3000 7.1 / qa before treating as authoritative.
Used for pre-2007 Microsoft Excel files.
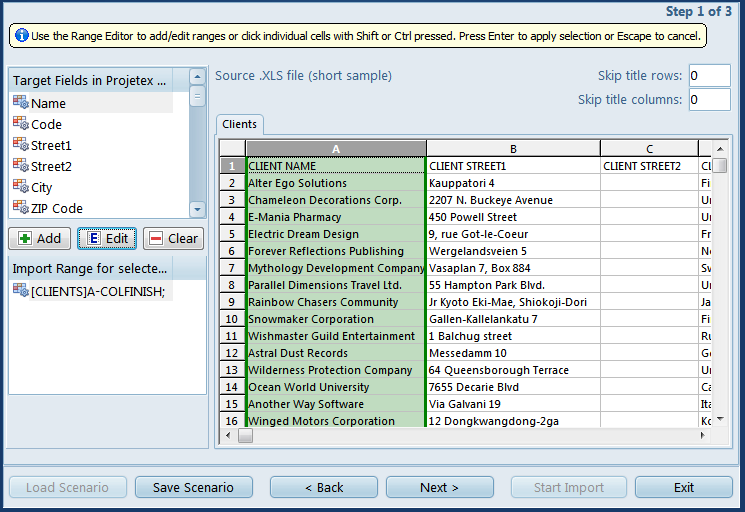
The two main elements are the Target Field List in the upper-left, and the file contents on the right side of the screen.
To designate a range of cells to be imported into a field of the Client (or Freelancer) table in Projetex, select the target field and click Add.
This will bring up the New/Edit Range dialog:
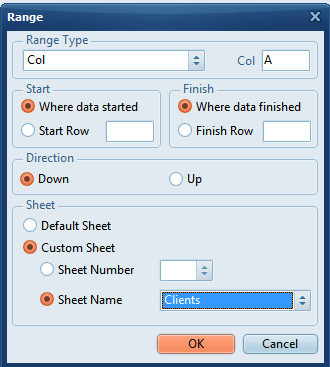
Here you can determine the range’s type (row or column or single cell), it’s location and boundaries, as well as the direction in which the data in it should read.
A single target field can have multiple ranges. An existing range can be edited or removed.
Alternatively, you can hold Ctrl or Shift and click the rows/columns/cells you want to add to a particular range. Press Enter to confirm your selection or Escape to cancel it.
If the table has a number of title rows and/or columns, they can be skipped by inputting their number into the Skip title rows/columns filed in the upper-right corner of the main editor.

See also: